on all orders over £20.00
on all orders over £20.00
Make beautiful, charming bunting for birthdays, Christmas, weddings, parties and anniversaries.
The bunting featured in the birthday card ‘Birthday Cake’ was very easy to make just following 3 simple steps.
This straightforward technique uses felt fabric or old woollens and easy needle-felting techniques rather than traditional cotton and polyester fabrics. Using this method you can easily create your own personalised bunting.

You can make anything you can think of with this technique to fit the occasion adding personal details such as an image of a favourite pet, place or the family home.
Here’s some festive bunting I made for my friend whose name is “Bunty” and "Merry Christmas" bunting.


Felt bunting has a lovely ‘weight’ to it which hangs perfectly inside or outdoors, keeps forever and never frays. You only need a small area to work such as a small table or even just in your lap with a needle felting mat.
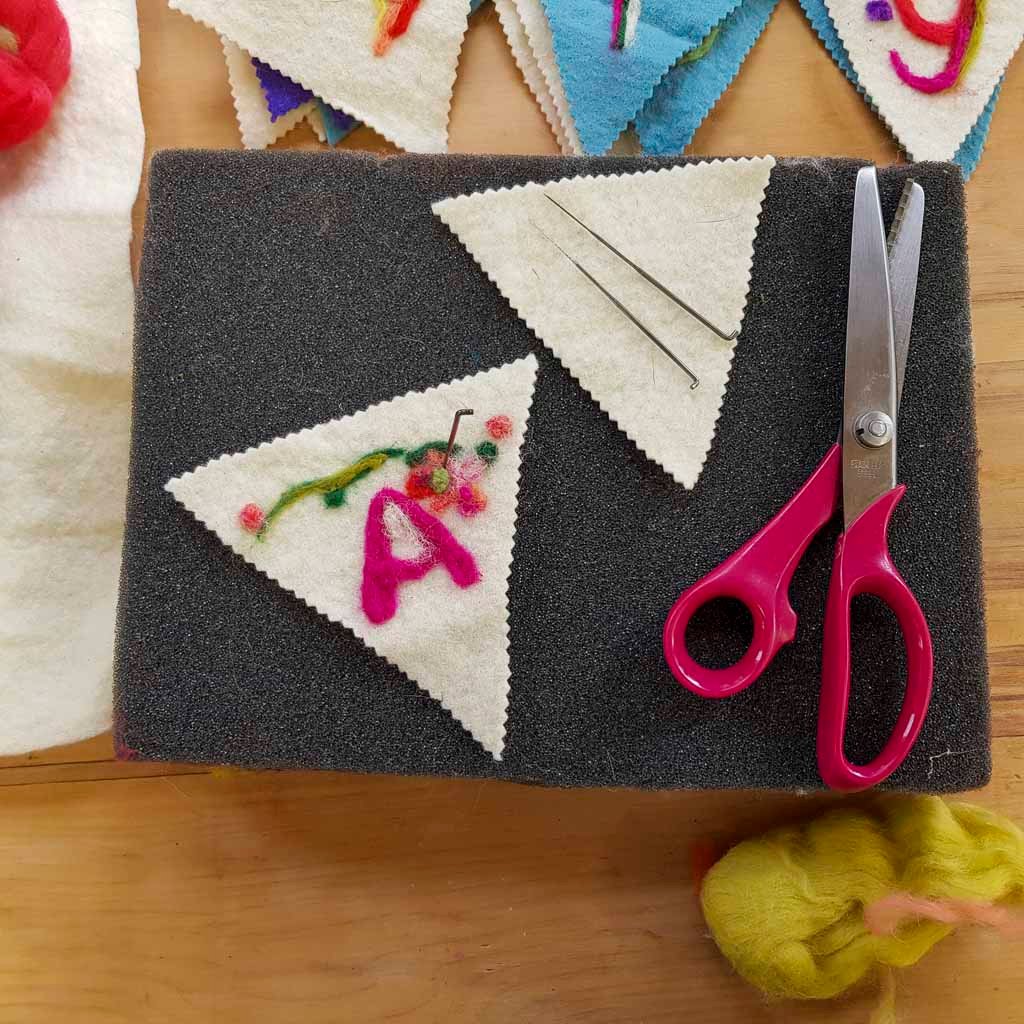
You will need:
There is a suggested list of where to buy these at the end

STEP 1: Prepare Fabric
Firstly, take your wool felt fabric - how much depends on the size of your bunting - as a guide I used roughly 60cms x 30 cms of wool felt to make my ‘Happy Birthday’ bunting - each triangle is 13cm x 3 sides.
If you are using an old woolly jumper or blanket it first needs to be ‘felted’ by washing on at least a 40 degree wash. It needs to be 100% wool or a wool blend with other natural fibres only, e.g. cashmere - as only these will felt. By doing this you create a sturdy base fabric that you can then needle-felt into. If you are using felt pieces you can make these have a softer edge - I would say more soft and cosy - a bit ‘hygge’ - by felting in the washing machine first. This will cause the fabric to shrink a bit so you need to account for this
STEP 2: Cut Fabric
Cut out your triangles as many as you need preferably with pinking shears if you have them although not essential as felt doesn’t fray.
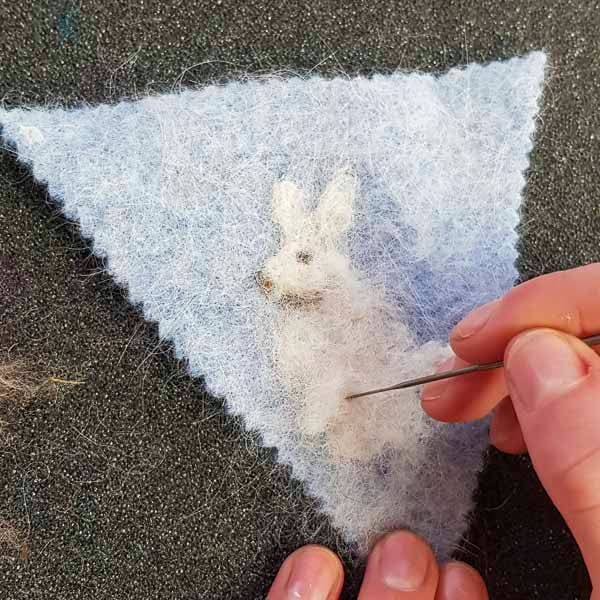
Put your triangle onto the felting mat and taking a small piece of your felting wool, place it on the first triangle and needle-felt your design onto the fabric. Using a stabbing motion the fibres ‘knit’ together very quickly. Make a loose shape of what you want and then ‘neaten’ it up to the final image - there is a bit of extra information on how to needle felt lower down (there are lots of videos too on how to needle felt and it couldn’t be simpler).
At this stage you can be as creative as you want adding pom-poms, spelling names, images of family pets or hearts or any motifs.
Needle felting is a short stabbing motion into your wool which tangles the fibres together. If you are making a flower shape, for example take a piece of wool and shape each petal - needle punch or stab it into the fabric and add as you go. You can mix differently coloured wool fibres to make new colours a bit like in painting.

STEP 3: Assemble
Assemble together your bunting and using ribbon or bias binding fold the bias binding over the edge and pin it together taking care to leave a small space between each triangle.
Using a straight or zig-zag stitch on a sewing machine and leaving enough ribbon either side for attaching and hanging, sew the bunting together and - ta-da - finished!
Now for the tea and cake whilst you sit back and admire!

Where to Buy Materials for Felt Bunting:
Wool Felt Company - They sell 1mm and 2mm 100% wool in a variety of colours
World of Wool - World of wool sell 100% wool felt and also a variety of wool tops for needle-felting - you can also make up your own bag of colours
The Makerss - They sell tools, materials and accessories for needle felting and felting fibres